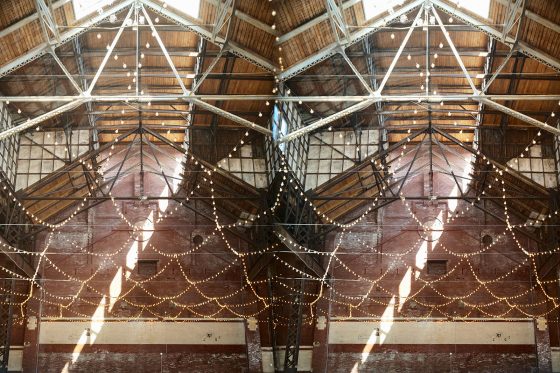
A complete 3D photography solution for the modern Leica M is by Onasj:
I became interested in developing a 3D photography (stereophotography) capturing and viewing solution for the modern Leica digital M—one that does not require special glasses or projectors, or crossing your eyes. This quest was ultimately successful, and I’ve been really impressed with the quality of the resulting 3D images, and amazed by how much the depth axis adds to the impact and compositional possibilities of photography. This article documents my findings, and provides a how-to guide for those interested in doing the same.
As many of you know, Leica prototyped in the 1940s and produced in the 1950s a remarkable stereophotography lens, the Stemar (stereo Elmar), code OISBO. The lens consists of two side-by-side mini-lenses, with a single lever to control the aperture of both lenses. The focal lens of the production lenses is 33 mm, with a maximum aperture of f/3.5. About 1,571 Stemar lenses were made.
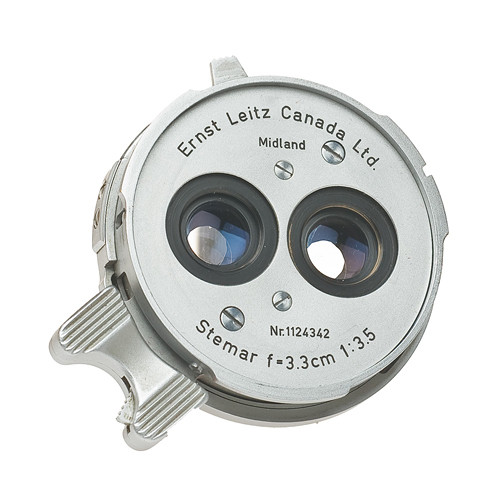
The Stemar comes in two mounts: LTM (screw mount) or M-mount. Of course the LTM version can be adapted to the M-mount with a Leica or third-party LTM-to-M adapter.
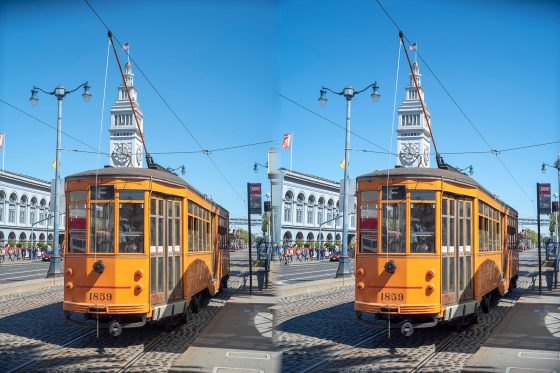
The photographs taken by the Stemar divide the 24×36 mm frame into a 18×24 mm left half and a 18×24 mm right half, with each lens generating an image on each half of the film. Because the lenses are offset by ~1 inch, each half of the pair of images if sent to each of your eyes will result in the perception of a 3D image. The greater the offset, the greater the stereo effect. Leica also produced a prism that attaches to the end of the Stemar lens, increasing the left-right offset distance to about 3 inches, similar to that of adult human eyes. Taking photos with the prism attachment greatly increases the 3D effect, but also makes viewing the photos a bit more difficult, especially if the subject was captured at a short distance from the camera.
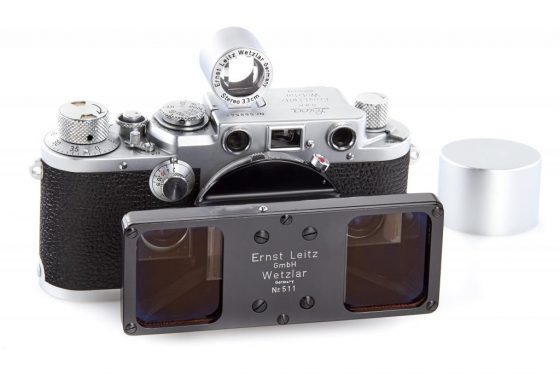
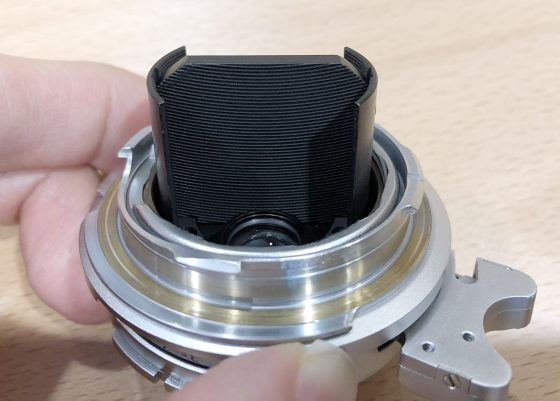
The rear of the Stemar lens is unusual to say the least. Protruding from the center of the rear of the lens is a rather thick black divider with many grooved light traps, which prevents each of the lens’s images from intruding on the other half of the film.
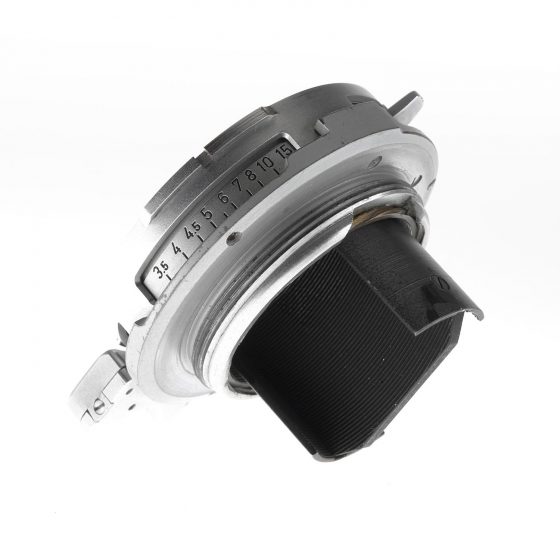
The Stemar was of course designed for film use. To view the stereophotos was a cumbersome process. One had to develop the film, then place the prints or slides in special illuminated stereo goggle viewers (offered by Leica as well), or in special projectors that send differently polarized light through each half of the stereopair, coupled with polarized glasses worn by the viewers. It was a complex and, generally, an individual experience. Perhaps for this reason, the demand for stereophotography didn’t endure, and after about 1957 Leica stopped producing the Stemar.
Some of us, especially those trained in the molecular life sciences in the late 20th century, have trained our eyes to view side-by-side stereopairs without any special glasses by simply crossing our eyes. With practice, this process is very fast, but suffers from several drawbacks. The resulting image appears as a triple image: a ghostly image to the left, a ghostly image to the right, and a stereoimage in the middle. So the 3D image is not seen free of distracting flat/ghostly copies of the image immediately left and right of the 3D image. Moreover, the process causes some eye strain. Finally, some people just cannot train their eyes to see stereoimages this way, and give up, usually with a headache.
Obtaining and modifying a Leica Stemar lens
The first step is to obtain a Stemar lens and modify it to work on the M10. The Stemar has not been manufactured for more than 60 years. As such, obtaining one is not trivial, but also not difficult. Several are usually for sale on eBay, with others available through camera dealers and even some Leica stores that deal in used equipment. Expect to pay around $3,000-4,000 USD (as of this writing) for a good, fully working, fairly clean copy of an LTM-mount Stemar. The M-mount versions are more rare and typically more expensive.
Mine was an LTM mount lens, which I adapted using an inexpensive Leitz LTM-to-M adapter. One important note is that unlike other lenses, the precise extent to which the Stemar is screwed into the adapter (or into the screw-mount leica camera) is critical, because if it is over-screwed or under-screwed the two lenses will not be properly aligned with respect to the horizon, and the two halves of the stereopair will be displaced vertically. Your brain can compensate for a small amount of displacement, but proper horizontal alignment of the lenses is desirable.
In the first of three problems I encountered adapting the Stemar to the M10, when screwed into the authentic Leitz LTM adapter and mounted on my M10, my Stemar was rotated too far clockwise. The Stemar has two adjustment screws which, when loosened, allow precise rotational adjustment of the lenses, but the possible range of this adjustment is modest, exceeding the extent to which the lens was rotated excessively clockwise. So I wrapped a thin layer of teflon tape around the Stemar’s threads, which prevented over-screwing the lens into the adapter, and fixed the problem completely.
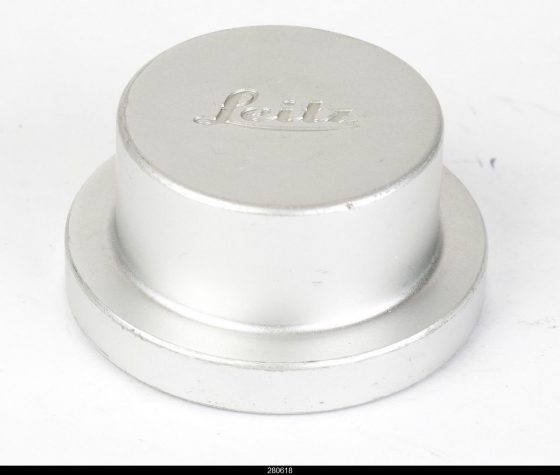
The second problem adapting the Stemar to the M10 is that the bulky protrusion at the rear of the lens means your M-mount lens caps won’t fit. Except, that is, for the Leitz/Leica rear lens cap (IROOW) designed for the Leica 21/3.4 Super-Angulon-M and the 28/2.8 Elmarit-M. You can get a third-party version of these rear caps for about $15, or a genuine one for about $100, from eBay.
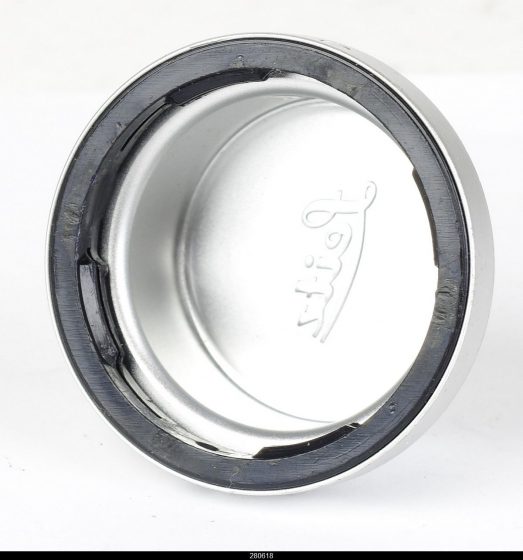
The third challenge adapting the Stemar to the M10 was a bit trickier to overcome. If you look at the photo showing the rear of the Stemar lens, you’ll notice that the corners of the central divider are truncated. This truncation allows the rear divider to not collide with the stiff “curtains” above and below the shutter when the lens is mounted on or taken off. On the M10, the corners of the divider are not sufficiently cut (at least in the case of my LTM-adapted Stemar) and the divider therefore rubs against the top and bottom curtains above and below the shutter when you mount or unmount the lens, especially if the rear element is fully extended, which occurs when the lens is focused at infinity.
Fortunately, the fix is quite easy. If you look at the photo of the rear of the Stemar above, you’ll notice that the central divider is secured with two flat-head screws, one of which is visible in the photo. If you unscrew these screws, central divider simply slides out from between the two curved “wings”. One simply needs to shave a bit more from the corners from the divider, which is flat black-painted metal (aluminum?), after removing the divider from the lens. This can be done in minutes with sandpaper and a hard table, or in seconds with a Dremel. I removed about 2 mm from each corner. I then painted the sanded-down corners with flat-black enamel, then remounted the divider into the rear of the Stemar with the two screws. The result looks clean, as you can see in the photo below showing the modified Stemar mounted in the LTM-to-M adapter.
Taking stereophotos with Leica M10 + modified Stemar
Now for the fun part! The Stemar once modified in this way works very well with a digital Leica M (in this case, the M10) in Live View mode. The rangefinder focusing of this lens works as any Leica M lens, and the small aperture of the Stemar means even approximate zone focusing is sufficient in most cases. Automatic exposure WITHOUT Live View does NOT work, as the central divider interferes with metering, causing many stops of overexposure. But Live View automatic exposure works very well, and I would recommend using Live View for precise framing of your stereophotos regardless, because framing a stereopair can be tricky since the framing of each half is slightly different.
Of course the Stemar is not 6-bit coded, and as has been previously documented, digital M cameras may behave oddly when trying to determine if a lens is mounted. You can overcome these issues by setting lens autodetection to Off or, in some cases, Manual. It is also possible that using a third-party LTM-to-M adapter that supports 6-bit coding will work, but I haven’t tested this approach.
All stereophotos taken with the Stemar will be of vertical (portrait) orientation framing, as rotating the camera sideways produces an up-down pair instead of a left-right pair that cannot be used for stereophotography. However, when rotated the M10+Stemar could be used in a pinch as 12 MP resolution camera that takes two slightly offset photos at a 33 mm (not 66 mm) focal length equivalent.
The Stemar lens is sharp at any aperture (f/3.5-11), fairly contrasty, low-distortion and renders with very nice colors. Bokeh isn’t really a consideration since the widest aperture is f/3.5, but I did not find the few out-of-focus areas to be unusually distracting. The prism attachment will vignette the upper left corner of the left image and the upper right corner of the right image, but it’s usually not noticeable when viewing unless you look for it. You’ll also lose some light (maybe half a stop) with the prism attachment, but the stereo effect is much stronger with the prism attached, and I recommend using it for all photos taken at more than about 5 feet away.
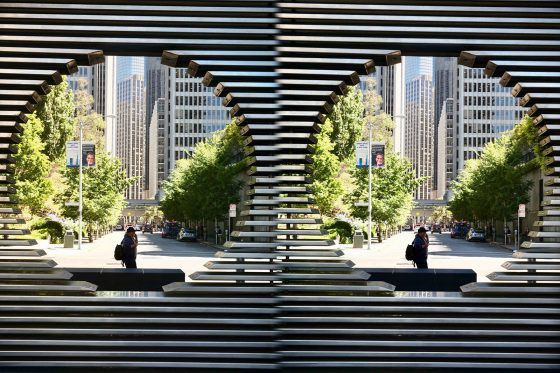
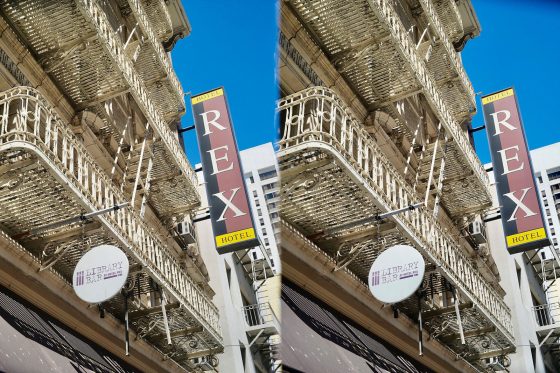
Here are a few sample photos taken with the M10 and modified Stemar (postprocessing only for color and exposure adjustment):
Viewing high-quality stereophotos without glasses
Without a high-quality, convenient, portable viewing system, it is difficult to appreciate and share stereophotos. After some searching, I found a solution that works remarkably well. Best of all, it costs only ~$140, making it perhaps the least expensive accessory for a Leica that I own:).
A little-known (at least in the West) Android smartphone called the Elephone P8 3D provides an amazing, glasses-free, projector-free, eye-crossing-free way to view your stereophotos in bright, high-resolution, broad color spectrum 3D. As far as I can tell, the easiest way to get the phone is through eBay. It will cost about $140 USD, shipped from Asia. Here’s what the phone looks like from the front and rear:
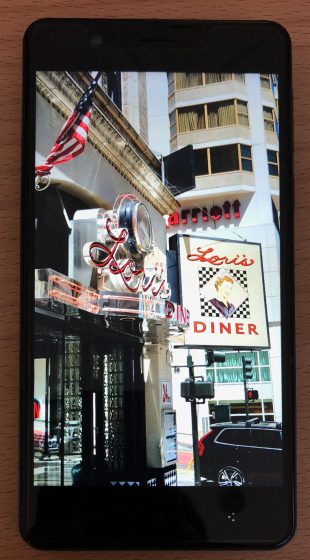
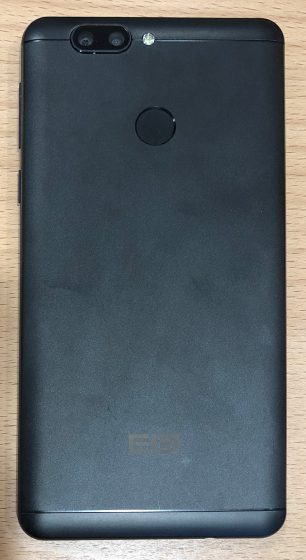
The Elephone P8 3D has an excellent, modern display, with 1920×1080 resolution at 428 ppi on a 5.5” IPS LCD. The color rendering after you tweak the settings as I describe below is excellent, as evidenced by comparing the unadjusted iPhone photo of the Elephone’s screen displaying the photo of Lori’s Diner with the actual photo of Lori’s Diner shown above. More importantly for this application, it has an amazing lenticular display feature that, when activated, will show a different image to your left and right eyes, apparently at very high resolution, without requiring any special headwear. In practice, with the tweaks described below, this works astoundingly well, and allows comfortable, bright, colorful, minimally ghosted, 3D image viewing of the Stemar photos shot on your M10.
First, you need to make a few settings adjustments on the Elephone. The English on the phone is questionable, so here are the settings to change:
1) Home (the middle button at the bottom of the phone) > Settings > Display > Miravision: change saturation, contrast, and brightness to taste. For me, I increased saturation substantially to match the M10 and my computer displays.
2) Home > Settings > Display > 3DSetting: 3D Service Setting ON, View Point Setting 1. This unhelpful named setting controls, I think, the angle of display into each eye. I find Setting 1 to be more comfortable and ghost-free, but given that everyone’s eye spacing is different, you may want to test both.
3) Connect the phone to the internet over WiFi (Home > Settings > Wi-Fi). Open the “3D Media” app. Now this next step is critical. The app asks you to hold the phone horizontally (landscape orientation) and to look at the 3D picture of a cyclist on a road running through mountains. There are two buttons on-screen: NOT CLEAR and CLEAR (also very confusingly named). There’s a high likelihood that the image as shown is “clear”, meaning that the 3D effect works as intended. But you actually want to lie and press “NOT CLEAR”, which causes the phone to swap the images being sent to your left and right eyes. The cyclist photo will now appear fairly flat, a bit messed up, and not very 3D. This is because when the visual depth cues in the content of a photo disagree with the stereoscopic depth cues from differences between your left and right eye images, your brain interprets the image as flat-ish, rather than backwards. Which is a really cool piece of biology, by the way.
The reason we want to tell the Elephone that the images need to be reversed is because the convention by which the Leica Stemar puts the left and right eye images on the sensor is the opposite of the convention used by most modern stereopairs. Out-of-camera Stemar images need to be viewed with the “cross-eyed” orientation, such that the left half of the stereopair is sent to the right eye, and the right half is sent to the left eye. Most modern 3D displays (including VR headsets like the Oculus Rift and HTC Vive) simply send the left image to your left eye, and the right image to your right eye. Fortunately, telling the Elephone that the cyclist image is “NOT CLEAR” causes the phone into swapping the left/right orientation. The result is that the default 3D images that came with the phone will look flat-ish and messed up, but all your Stemar images will be clear and 3D.
Once the 3D Media app is properly set, all that’s left to do is to transfer your M10’s Stemar photos to the phone. There are several ways to do this, but I prefer using Dropbox:
1) Download the (free) Dropbox app from the Google Play store, log in to Dropbox, and navigate to your folder containing your Stemar images (DNG or JPG both work).
2) Tap the check box icon in the upper right of the screen. This allows you to select multiple files. Check all the ones you want to transfer to the Elephone.
3) Once selected, tap the “three dots” icon in the upper right of the screen, then tap Save to Device.
4) Choose a folder (I recommend the “Download” folder). All checked files will download to that folder.
5) Now open the 3D Media app. The photos should appear below the thick grey line on the screen.
The first time you open a Stemar photo in 3D Media, you have to adjust the settings of that photo as follows:
1) Hold the phone horizontally (landscape orientation)
2) Tap on the photo until the five buttons at the bottom of the screen appear.
3) Tap “Format” and then tap on “Clear” (again, the English is terrible). The other choices are as follows: “2D” allows you to view the entire Stemar frame normally, with both the left and right halves of the stereopair. “Normal” is terrible and stretches the photo to fill the frame. For proper 3D viewing, “Clear” is the best setting.
Once you set each new photo to “Clear”, then the Elephone remembers to use that setting whenever you view that photo, so fortunately this setting only needs to be done one time per photo.
Finally, seeing the full photo necessarily comes with letterboxing on the left and right of the image, since the Stemar only takes portrait-orientation stereophotos, and the Elephone only displays in 3D when oriented horozontally. But when you double tap a photo, you’ll zoom in to fill the entire screen, even while still in 3D! Due to a bug in the 3D Media app, this feature only works AFTER you navigate away from the photo the first time, but will work for all subsequent viewing attempts. You can even use your finger to scroll the photo up and down, in 3D, while zoomed in to fill the screen.
To see a full-screen 1920×1080 3D photo floating above the screen at 428 ppi and with very good color, while not needing any special glasses or headsets, is mindblowing, at least to me. I notice and appreciate details of the scene, composition, or subject, that just aren’t conveyed in a 2D photo.
Notably, the Elephone should also be able to play 3D movies as well, and of course the Stemar should be compatible with a number of M-mount video capture platforms.
I hope you found this account of my quest stimulating and helpful. There are a couple additional out-of-the-box ways I’m using my M10 that I hope to share with the community in the future.
If you have an interesting idea for a guest post, you can contact me here.
